AI-Powered Visual Diff: Beyond Pixel Comparison
Pixel-by-pixel comparison is the foundation of visual regression testing, but it has a fundamental problem: it's too precise.

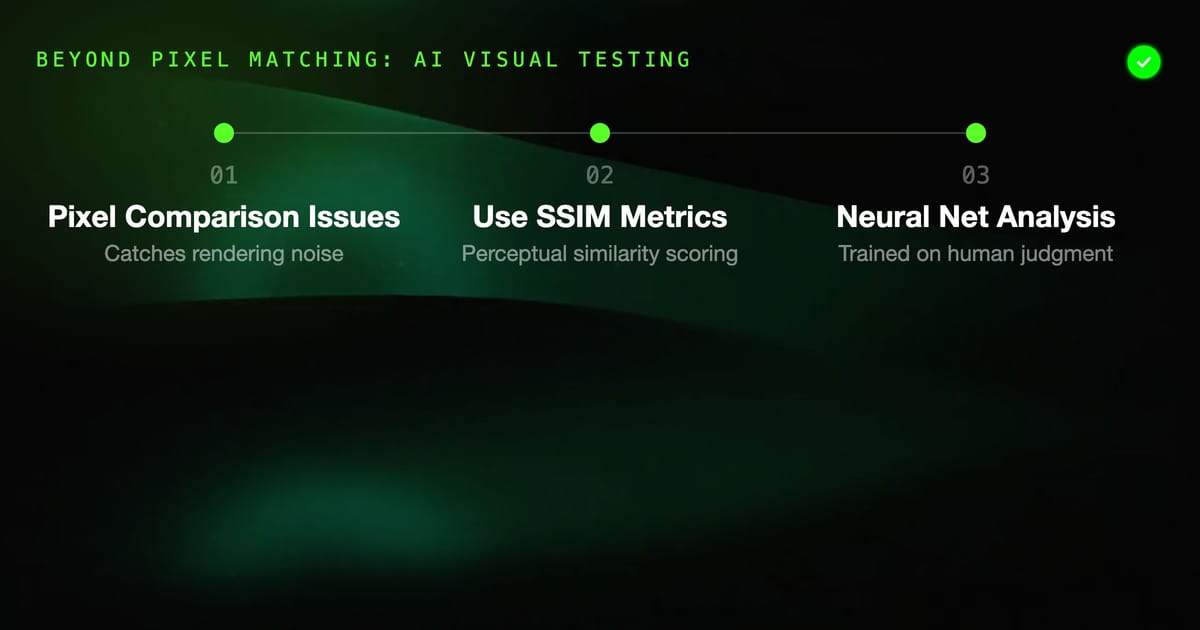
Pixel-by-pixel comparison is the foundation of visual regression testing, but it has a fundamental problem: it's too precise. Two screenshots that look identical to a human can differ by thousands of pixels due to font rendering, antialiasing, subpixel differences, or minor layout shifts from non-deterministic rendering. This leads to flaky visual tests — tests that fail not because the UI changed meaningfully, but because the rendering engine made slightly different subpixel decisions on this run.
The solution is perceptual similarity: measuring visual difference the way humans measure it, not the way a bitmask comparison does. This is where AI and machine learning techniques enter visual testing.
The Problem with Pixel Comparison
Consider a heading rendered in Chrome on macOS vs. the same heading rendered in Chrome on Linux (as in CI). The text content, font, size, color, and weight are identical. But macOS uses subpixel antialiasing while Linux uses grayscale antialiasing. A pixel-by-pixel comparison will report hundreds or thousands of different pixels, even though a human reviewer would say the two screenshots look the same.
Other sources of false positives in pixel comparison:
- GPU rendering variations: Gradient antialiasing differs between GPU drivers
- Emoji rendering: Emoji are rendered by the OS, not the browser, and vary significantly across platforms
- Scrollbar visibility: Some OSes show scrollbars permanently; others hide them until scrolling
- Font hinting: Different hinting algorithms produce different glyph outlines at small sizes
- Animation frame timing: A screenshot taken during a fade-in captures a different opacity than expected
Tools deal with this through configurable thresholds — allow up to N pixels to differ, or allow up to X% color difference per pixel. But thresholds are imprecise. A threshold that ignores font antialiasing differences might also ignore a genuine color regression.
Structural Similarity Index (SSIM)
SSIM (Structural Similarity Index) is a well-established metric from image processing research (Wang et al., 2004) that measures perceptual similarity between images. Instead of comparing pixel values directly, SSIM measures three properties:
- Luminance — how bright the image regions are
- Contrast — the variance of pixel values in a region
- Structure — the correlation of pixel patterns
SSIM values range from -1 to 1, where 1 means identical. Perceptually similar images score close to 1 even if they differ at the pixel level due to antialiasing.
Using SSIM in Practice
The ssim-js library brings SSIM to JavaScript:
import { ssim } from 'ssim.js';
import { PNG } from 'pngjs';
import fs from 'fs';

function loadImage(filePath) {
  const buffer = fs.readFileSync(filePath);
  return PNG.sync.read(buffer);
}

function compareImages(baselinePath, actualPath) {
  const baseline = loadImage(baselinePath);
  const actual = loadImage(actualPath);

  const { mssim, performance } = ssim(
    { data: baseline.data, width: baseline.width, height: baseline.height },
    { data: actual.data, width: actual.width, height: actual.height }
  );

  return { mssim, performance };
}

const { mssim } = compareImages('baseline.png', 'actual.png');
console.log(`SSIM: ${mssim}`); // 0.98 = very similar, 0.80 = noticeable difference

const ACCEPTABLE_SSIM = 0.98;
if (mssim < ACCEPTABLE_SSIM) {
  throw new Error(`Visual regression detected: SSIM ${mssim} < ${ACCEPTABLE_SSIM}`);
}SSIM handles antialiasing much better than pixel comparison because minor edge differences don't change the structural correlation of the region. A button border that's 1px different due to antialiasing will score 0.99+ on SSIM even though it fails pixel comparison.
Perceptual Hashing
Perceptual hashing (pHash, dHash, aHash) generates a compact fingerprint of an image that captures visual structure. Images that look similar produce similar hashes; images that look different produce different hashes. You can measure the Hamming distance between hashes to quantify similarity.
Unlike SSIM (which requires images to be the same size), perceptual hashing handles minor size differences gracefully.
dHash Implementation
dHash (difference hash) works by resizing the image to a small grid, computing horizontal pixel gradients, and encoding whether each gradient is positive or negative:
import Jimp from 'jimp';

async function dHash(imagePath, hashSize = 8) {
  const image = await Jimp.read(imagePath);

  // Resize to hashSize+1 × hashSize
  image.resize(hashSize + 1, hashSize);
  image.grayscale();

  const hash = [];
  for (let y = 0; y < hashSize; y++) {
    for (let x = 0; x < hashSize; x++) {
      const leftPixel = Jimp.intToRGBA(image.getPixelColor(x, y)).r;
      const rightPixel = Jimp.intToRGBA(image.getPixelColor(x + 1, y)).r;
      hash.push(leftPixel > rightPixel ? 1 : 0);
    }
  }

  return hash;
}

function hammingDistance(hash1, hash2) {
  return hash1.reduce((acc, bit, i) => acc + (bit !== hash2[i] ? 1 : 0), 0);
}

async function compareWithPHash(baselinePath, actualPath) {
  const [h1, h2] = await Promise.all([
    dHash(baselinePath),
    dHash(actualPath),
  ]);

  const distance = hammingDistance(h1, h2);
  const similarity = 1 - distance / h1.length;

  return { distance, similarity };
}

const { distance, similarity } = await compareWithPHash('baseline.png', 'actual.png');
// distance of 0 = identical, distance of 64 = completely different (for 8×8 hash)
// similarity of 1.0 = identical, 0.9+ = very similarA Hamming distance of 5 or less on a 64-bit hash typically indicates near-identical images. A distance of 10+ indicates meaningful visual differences.
Neural Network Visual Diffing
The most sophisticated approach uses neural networks trained to predict human perception of visual similarity. These models learn from human judgments of which image differences are "noticeable" and which are "acceptable," producing a similarity score that correlates with human review.
Applitools Eyes
Applitools Eyes uses a proprietary neural network they call Visual AI. It compares screenshots and classifies differences as:
- Ignore — rendering differences that humans wouldn't notice (antialiasing, font rendering)
- Layout — structural changes (element moved, size changed)
- Content — text or image content changed
- Strict — pixel-level differences flagged explicitly
Setup with Playwright:
import { test } from '@playwright/test';
import { Eyes, Target, Configuration, BatchInfo } from '@applitools/eyes-playwright';

const batch = new BatchInfo({ name: 'My App Visual Tests' });

test.describe('Visual tests', () => {
  let eyes;

  test.beforeEach(async ({ page }, testInfo) => {
    const config = new Configuration();
    config.setApiKey(process.env.APPLITOOLS_API_KEY);
    config.setBatch(batch);

    eyes = new Eyes();
    eyes.setConfiguration(config);
    await eyes.open(page, 'My App', testInfo.title);
  });

  test.afterEach(async () => {
    await eyes.closeAsync();
  });

  test('Homepage', async ({ page }) => {
    await page.goto('https://example.com');
    await eyes.check('Homepage', Target.window().fully());
  });

  test('Dashboard', async ({ page }) => {
    await page.goto('/dashboard');
    await page.waitForSelector('[data-testid="chart"]');
    // Check only a specific region
    await eyes.check('Dashboard chart', Target.region('[data-testid="chart"]'));
  });
});Applitools handles cross-browser rendering differences, dynamic content regions, and font rendering variations without manual configuration. The Visual AI model decides what's a meaningful difference vs. rendering noise.
Lost Pixel
Lost Pixel is an open-source alternative that focuses on component-level testing with a simpler setup. It uses Playwright under the hood and stores baselines in your repository:
// lostpixel.config.js
export const config = {
  storybookShots: {
    storybookUrl: 'http://localhost:6006',
  },
  lostPixelProjectId: 'your-project-id',
  apiKey: process.env.LOST_PIXEL_API_KEY,

  // Configure thresholds
  threshold: 0.01,  // 1% of pixels can differ

  // Mask dynamic content
  mask: [
    { selector: '[data-testid="timestamp"]' },
    { selector: '.live-chart' },
  ],

  // Custom snapshot directory
  customShots: {
    currentShotsPath: '.lostpixel/current',
    baselineShotsPath: '.lostpixel/baseline',
  },
};Run it:
npx lost-pixelLost Pixel integrates with GitHub Actions and posts PR comments showing which stories changed.
Writing Tolerance Rules for Acceptable Visual Drift
Not all visual differences are regressions. A robust visual testing setup distinguishes between:
- Rendering noise — differences caused by the environment, not code changes
- Intentional changes — accepted design updates
- Regressions — unintended visual changes that need fixing
Region-Based Tolerance
Define different tolerance levels for different regions of the screen:
// Custom visual comparison with region-specific tolerance
async function compareWithRegionTolerance(baselinePath, actualPath, regions) {
  const { PNG } = await import('pngjs');
  const { default: pixelmatch } = await import('pixelmatch');
  const fs = await import('fs');

  const baseline = PNG.sync.read(fs.readFileSync(baselinePath));
  const actual = PNG.sync.read(fs.readFileSync(actualPath));
  const diff = new PNG({ width: baseline.width, height: baseline.height });

  let totalDiff = 0;

  for (const region of regions) {
    const { x, y, width, height, tolerance } = region;
    const regionDiff = pixelmatch(
      baseline.data,
      actual.data,
      diff.data,
      baseline.width,
      baseline.height,
      {
        threshold: tolerance,
        includeAA: true,
        // Restrict comparison to this region
        clip: { x, y, width, height },
      }
    );
    const regionPixels = width * height;
    const diffRatio = regionDiff / regionPixels;

    if (diffRatio > tolerance) {
      totalDiff += regionDiff;
    }
  }

  return totalDiff;
}Playwright with Custom Comparison
Playwright's toHaveScreenshot uses pixelmatch internally but doesn't expose SSIM. For SSIM-based comparison, write a custom matcher:
// test-utils/visual-matchers.ts
import { expect } from '@playwright/test';
import { ssim } from 'ssim.js';
import { PNG } from 'pngjs';
import fs from 'fs';
import path from 'path';

expect.extend({
  async toMatchSsim(page, snapshotName, { threshold = 0.95 } = {}) {
    const actualPath = path.join('/tmp', `actual-${snapshotName}`);
    await page.screenshot({ path: actualPath });

    const baselinePath = path.join('__baselines__', snapshotName);

    if (!fs.existsSync(baselinePath)) {
      fs.copyFileSync(actualPath, baselinePath);
      return { pass: true, message: () => `Baseline created: ${baselinePath}` };
    }

    const baseline = PNG.sync.read(fs.readFileSync(baselinePath));
    const actual = PNG.sync.read(fs.readFileSync(actualPath));

    const { mssim } = ssim(
      { data: baseline.data, width: baseline.width, height: baseline.height },
      { data: actual.data, width: actual.width, height: actual.height }
    );

    const pass = mssim >= threshold;
    return {
      pass,
      message: () =>
        pass
          ? `Expected SSIM to be below ${threshold}, but got ${mssim.toFixed(4)}`
          : `Visual regression: SSIM ${mssim.toFixed(4)} < threshold ${threshold}`,
    };
  },
});

// Usage in tests:
// await expect(page).toMatchSsim('homepage.png', { threshold: 0.97 });Ignore Regions by Selector
For components with legitimately dynamic content that can't be masked at the DOM level, define ignore regions by coordinate:
await expect(page).toHaveScreenshot('dashboard.png', {
  mask: [
    page.locator('[data-dynamic]'),
  ],
  // Also ignore the bottom 100px which has an ad
  clip: { x: 0, y: 0, width: 1280, height: page.viewportSize().height - 100 },
});Choosing the Right Approach
| Approach | Best for | Limitations |
|---|---|---|
| Pixel diff (pixelmatch) | Exact component states in controlled environments | Flaky on cross-platform, sensitive to antialiasing |
| SSIM | Balanced sensitivity, open source, no cloud | Requires integration work, still can miss layout shifts |
| Perceptual hash (pHash) | Quick similarity checks, cross-size comparison | Less precise for subtle color changes |
| Applitools Visual AI | Enterprise teams needing cross-browser coverage without false positives | Cost, vendor dependency |
| Lost Pixel | Teams wanting open-source with PR integration | Less mature, smaller community |
For most teams running visual tests in a controlled CI environment (same OS, same browser version), tuned pixel diff thresholds work well. Add SSIM as a second pass when you have persistent false positives from antialiasing.
Applitools or similar AI-powered services become worth the cost when you're testing across real devices, multiple browser versions, or when maintaining large threshold configurations becomes a maintenance burden.
Conclusion
Pixel comparison is the baseline of visual regression testing — easy to understand, easy to implement. But it struggles with the realities of cross-platform rendering, antialiasing, and subpixel differences that are visually meaningless but numerically significant.
Perceptual metrics (SSIM, pHash) and AI-powered services (Applitools, Lost Pixel) close that gap by measuring visual similarity the way humans do. They catch real regressions — layout shifts, color changes, missing elements — while ignoring rendering noise.
The right tool depends on your context: pixel diff with tuned thresholds for controlled CI environments, SSIM for a cost-free improvement in accuracy, and AI services when you need cross-browser reliability at scale. The techniques aren't mutually exclusive — many mature pipelines use pixel diff for fast local checks and an AI-powered service for the authoritative CI gate.