
OpsGenie for QA Teams: Test Failure Alerting and On-Call Routing

Test failures don't keep business hours. When your CI pipeline breaks at 2 AM or a production regression surfaces on a Friday afternoon, you need the right person paged immediately — not buried in a Slack thread nobody checks until Monday.
OpsGenie is Atlassian's on-call management and alerting platform. It sits between your monitoring tools and your team, routing alerts to the right engineer based on schedules, escalation policies, and the severity of what just broke. For QA teams running continuous testing, it's the missing layer between "test failed" and "someone fixed it."
This guide covers how to integrate OpsGenie into a QA workflow: connecting your CI system, building alert routing rules, reducing noise from flaky tests, and measuring your team's incident response.
Why QA Teams Need On-Call Alerting
Most QA tools are great at detecting failures. They're terrible at communicating them urgently.
Email is too slow. Slack channels get noisy. Without a proper on-call system, test failure alerts become background noise that developers learn to ignore. When something critical breaks, nobody knows who owns it.
OpsGenie solves this by adding:
- Routing logic — critical failures wake the on-call engineer; flaky test noise doesn't
- Escalation policies — if the first responder doesn't acknowledge, the alert escalates
- On-call schedules — rotation management so the right person is always on duty
- Deduplication — multiple alerts about the same failure become one incident
- Acknowledgment tracking — you know when someone owns the problem
Setting Up OpsGenie for Test Alerting
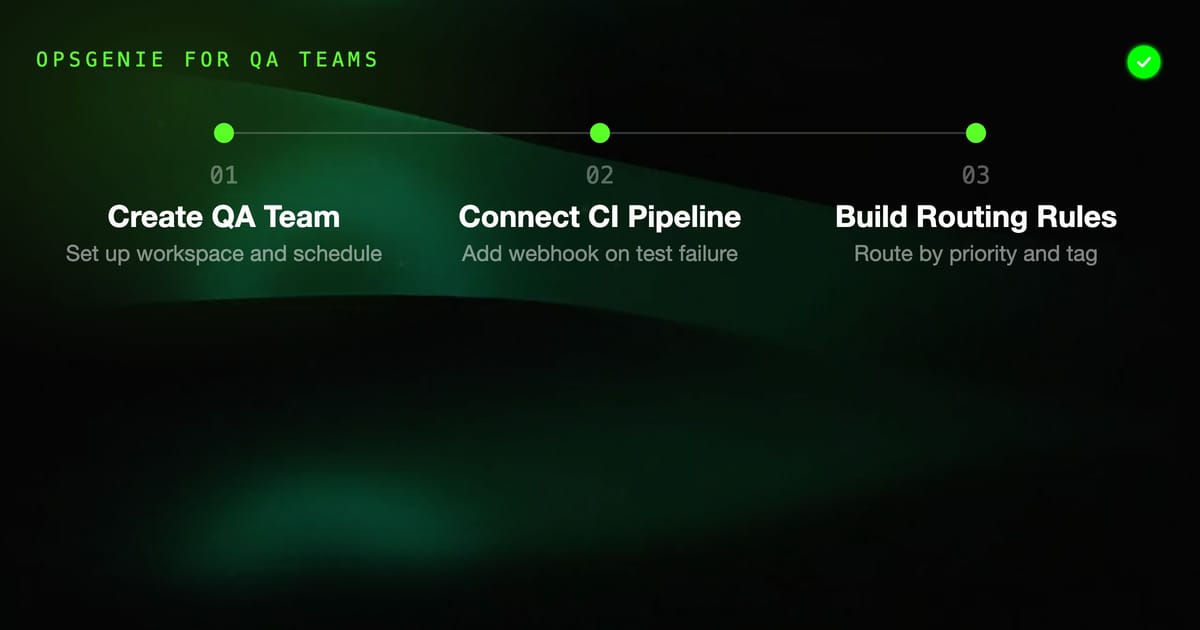
1. Create a QA Team and Alert Policy
Start by organizing your OpsGenie workspace around your QA function.
In the OpsGenie console:
- Go to Teams → Create Team
- Name it something like "QA Operations" or "Platform QA"
- Add team members with their notification preferences
- Set up an on-call schedule with weekly or daily rotations
2. Create an API Integration
OpsGenie receives alerts via its REST API. Most CI systems and testing tools can send webhooks or HTTP requests.
Navigate to Integrations → Add Integration → API. This gives you:
- An integration API key
- The REST endpoint:
https://api.opsgenie.com/v2/alerts
Save the API key — you'll need it in your CI configuration.
3. Connect Your CI Pipeline
For a GitHub Actions pipeline, add OpsGenie alerting on test failure:
jobs:
  test:
    runs-on: ubuntu-latest
    steps:
      - uses: actions/checkout@v3
      - name: Run tests
        id: tests
        run: npm test
        continue-on-error: true

      - name: Alert OpsGenie on failure
        if: steps.tests.outcome == 'failure'
        run: |
          curl -X POST https://api.opsgenie.com/v2/alerts \
            -H "Content-Type: application/json" \
            -H "Authorization: GenieKey ${{ secrets.OPSGENIE_API_KEY }}" \
            -d '{
              "message": "Test suite failed: ${{ github.repository }}",
              "alias": "ci-failure-${{ github.run_id }}",
              "description": "Branch: ${{ github.ref }}, Commit: ${{ github.sha }}",
              "priority": "P2",
              "tags": ["ci", "test-failure"],
              "details": {
                "repo": "${{ github.repository }}",
                "branch": "${{ github.ref }}",
                "workflow": "${{ github.workflow }}"
              }
}'The alias field is critical — OpsGenie uses it to deduplicate alerts. If the same pipeline fails multiple times, it updates one alert rather than creating a flood.
Alert Routing Rules
The real power of OpsGenie is routing different alerts to different people. Not every test failure is equally urgent.
Priority Levels
Map your test types to OpsGenie priorities:
| Test Type | Priority | Who Gets Paged |
|---|---|---|
| Production smoke tests | P1 | On-call engineer + manager |
| Integration test suite | P2 | On-call engineer |
| Unit test failures | P3 | Assigned developer (business hours) |
| Flaky/known-unstable tests | P4 | Logged, no page |
Routing by Tag
Create routing rules based on tags you send with alerts:
{
  "message": "Payment service integration tests failed",
  "priority": "P1",
  "tags": ["payment", "integration", "production"],
  "teams": [{"name": "Payments QA"}]
}In OpsGenie, set up routing rules so alerts tagged production always go to the on-call engineer. Alerts tagged staging only go to the assigned QA engineer during business hours.
Escalation Policies
Build escalation chains for critical alerts:
- 0 min — Page the on-call engineer
- 5 min (no ack) — Page the secondary on-call
- 15 min (no ack) — Page the engineering manager
- 30 min (no ack) — Create a P0 incident and notify the VP
This ensures critical test failures are never silently dropped.
Reducing Alert Noise from Flaky Tests
Flaky tests are the enemy of effective alerting. If 30% of your alerts are false positives, engineers start ignoring them all.
Alert Suppression for Known Flaky Tests
Maintain a suppression list in OpsGenie. When a test is known to be flaky and is being worked on:
- Create an OpsGenie maintenance window
- Or use alert policies to automatically close alerts from specific sources
In your CI script, tag flaky tests differently:
# Run tests with flaky flag
if npm run test:flaky 2>&1 | grep "FAILED"; then
  curl -X POST https://api.opsgenie.com/v2/alerts \
    -H "Authorization: GenieKey $OPSGENIE_API_KEY" \
    -H "Content-Type: application/json" \
    -d '{
      "message": "Known flaky test failed (monitoring only)",
      "priority": "P5",
      "tags": ["flaky", "no-page"]
    }'
fiP5 alerts are logged but don't trigger notifications.
Deduplication and Auto-Close
When a test failure is fixed and the pipeline turns green, automatically close the OpsGenie alert:
# On test success, close any open alert
curl -X DELETE "https://api.opsgenie.com/v2/alerts/ci-failure-$RUN_ID?identifierType=alias" \
-H "Authorization: GenieKey $OPSGENIE_API_KEY"This keeps your alert queue clean and makes it easy to see what's currently broken.
HelpMeTest + OpsGenie Integration
HelpMeTest runs continuous monitoring tests against your production and staging environments. When a test fails, you need someone to know immediately.
The integration is straightforward:
- In HelpMeTest, set up a webhook notification for test failures
- Point the webhook at your OpsGenie API endpoint
- Include the test name, environment, and failure details in the payload
{
  "message": "HelpMeTest: {{test_name}} failed",
  "alias": "hmt-{{test_id}}",
  "description": "{{failure_message}}",
  "priority": "P2",
  "tags": ["helpmetest", "{{environment}}"],
  "details": {
    "test_url": "{{test_url}}",
    "environment": "{{environment}}",
    "duration": "{{duration_ms}}ms"
  }
}When the test starts passing again, HelpMeTest sends another webhook that you can use to auto-resolve the OpsGenie alert.
On-Call Schedule Management
Good alerting requires good on-call scheduling. OpsGenie's schedule features help you build sustainable rotations.
Weekly Rotation Setup
- Navigate to Teams → Your Team → On-Call
- Create a schedule with a weekly rotation
- Add participants and define rotation order
- Set overrides for vacation, conferences, and holidays
Business Hours vs. 24/7
Not all QA alerts need 24/7 coverage. Configure your schedule to differentiate:
- 24/7 coverage — production monitoring, critical path tests
- Business hours only — staging environment, unit test failures, non-customer-facing systems
OpsGenie's time-based routing lets you send the same alert to different teams depending on when it fires.
Notification Rules
Each team member sets their own notification preferences:
- Primary contact method (mobile push, SMS, phone call)
- Backup methods if primary doesn't work
- Quiet hours with escalation exceptions for P1
Respect your team's preferences — engineers who get paged at 2 AM about P4 issues start disabling notifications entirely.
Metrics and Reporting
OpsGenie tracks the metrics that matter for QA incident response:
Mean Time to Acknowledge (MTTA)
How long does it take from alert firing to someone acknowledging it? For P1 production test failures, this should be under 5 minutes.
Track MTTA in Reports → Team Reports. If it's climbing, your escalation policy needs adjustment.
Mean Time to Resolve (MTTR)
From alert fire to resolution. For test failures this means: failure detected → root cause found → fix deployed → tests passing.
High MTTR suggests your alerts aren't providing enough context for engineers to diagnose quickly. Add more details to your alert payloads.
Alert Volume Trends
Increasing alert volume means either:
- More failures (bad)
- Alert policies need tuning (fixable)
- Test coverage is expanding (good, but tune routing)
Use OpsGenie's alert analytics to distinguish between these causes.
Common Integration Mistakes
Sending every failure as P1 — This trains engineers to ignore P1 alerts. Reserve P1 for customer-impacting failures.
No deduplication — A flapping test that fails and recovers 10 times in an hour creates 10 alerts. Use the alias field to deduplicate.
Alerting without context — "Test failed" tells the engineer nothing. Include the test name, error message, affected environment, and a link to the CI run.
Not closing resolved alerts — Open alerts accumulate and become noise. Auto-close alerts when tests start passing.
Paging individuals instead of teams — When the assigned person is on vacation, the alert goes to voicemail. Always alert teams, then route within the team.
Getting Started
OpsGenie offers a free tier for up to 5 users. For larger teams, pricing starts at $9/user/month for the Essentials plan.
The setup that matters most for QA teams:
- One API integration per CI system
- Clear priority mapping (P1-P4) for test types
- Escalation policy that guarantees critical alerts aren't dropped
- Auto-close when tests recover
With this in place, your team goes from "checking Slack to see if CI is green" to "getting paged only when something genuinely needs attention." That's the difference between reactive QA and proactive reliability.