
Adversarial Robustness Testing for ML Models: FGSM, PGD, and Beyond

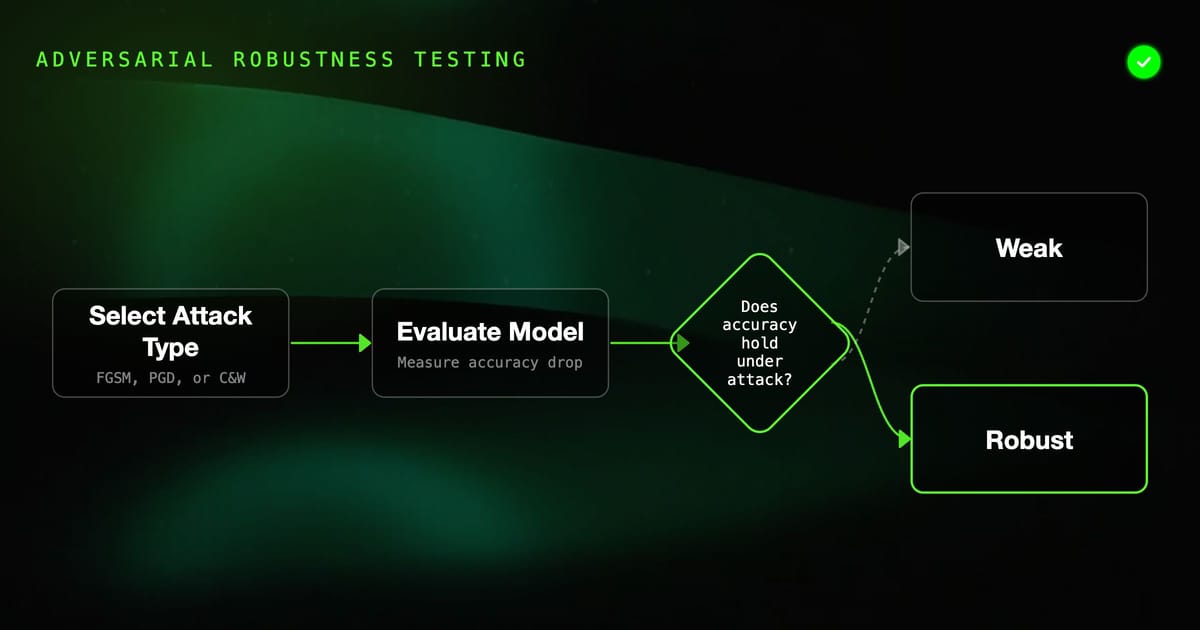
In 2014, Goodfellow, Shlens, and Szegedy published a result that the ML community found deeply unsettling: by adding a carefully crafted, human-imperceptible perturbation to an image of a panda, they could cause a well-trained image classifier to label it "gibbon" with 99.3% confidence. The perturbation was invisible to humans. The classifier's prediction flipped completely.
This was not a quirk of a particular model or architecture. It was a fundamental property of high-dimensional decision surfaces. A decade later, adversarial examples remain an active research area, and the engineering challenge of building and testing robust ML models has only grown more important as models are deployed in safety-critical contexts: medical imaging, autonomous vehicles, fraud detection, content moderation.
This post covers the theory and practice of adversarial robustness testing: the attack algorithms you need to understand, the libraries that implement them, how to measure robustness, and how to build robustness benchmarks into your ML development workflow.
The Geometry of Adversarial Examples
Understanding why adversarial examples exist requires a brief excursion into the geometry of neural networks.
A classifier trained on high-dimensional data (images, text embeddings) partitions the input space into regions, one per class. The decision boundary between regions is a high-dimensional surface. Training minimizes loss on the training distribution — but the training distribution is a sparse sample of the input space.
In high dimensions, the input space contains vast regions far from any training example. Neural network decision boundaries in these regions are essentially unconstrained by training and may be wildly erratic. Adversarial examples exploit this: they are carefully chosen points that cross a decision boundary while remaining imperceptibly close (in human perception) to the original input.
The key insight is that "imperceptibly close" is not the same as "geometrically close" in the L-infinity or L2 sense that the network uses. Human perception is not L2 distance; small L2-norm perturbations can produce large perceptual changes (blur, color shift) while adversarially significant perturbations can be imperceptible.
Attack Algorithms
Fast Gradient Sign Method (FGSM)
FGSM is the simplest adversarial attack. It takes a single step in the direction that maximizes the loss with respect to the input:
x_adv = x + ε · sign(∇_x L(f(x), y))Where:
xis the original inputεis the perturbation magnitude (typically 0.01–0.1 in [0,1] pixel space)Lis the classification lossyis the true label∇_xis the gradient of the loss with respect to the input
import torch
import torch.nn.functional as F

def fgsm_attack(model, images, labels, epsilon):
    images = images.clone().requires_grad_(True)

    outputs = model(images)
    loss = F.cross_entropy(outputs, labels)

    model.zero_grad()
    loss.backward()

    # Gradient sign gives the direction of maximum loss increase
    perturbation = epsilon * images.grad.sign()
    adversarial_images = torch.clamp(images + perturbation, 0, 1)

    return adversarial_images.detach()

# Measure accuracy under FGSM attack
def evaluate_fgsm_robustness(model, dataloader, epsilon):
    model.eval()
    correct_clean = 0
    correct_adv = 0
    total = 0

    for images, labels in dataloader:
        # Clean accuracy
        with torch.no_grad():
            outputs = model(images)
            correct_clean += (outputs.argmax(1) == labels).sum().item()

        # Adversarial accuracy
        adv_images = fgsm_attack(model, images, labels, epsilon)
        with torch.no_grad():
            adv_outputs = model(adv_images)
            correct_adv += (adv_outputs.argmax(1) == labels).sum().item()

        total += labels.size(0)

    return {
        "clean_accuracy": correct_clean / total,
        "adversarial_accuracy": correct_adv / total,
        "robustness_gap": (correct_clean - correct_adv) / total,
}FGSM is fast but weak — it is a one-step attack and often fails against models with even basic defenses. Its primary value is as a cheap sanity check during training and as a component in adversarial training.
Projected Gradient Descent (PGD)
PGD is the iterative generalization of FGSM. It takes many small gradient steps and projects back onto the ε-ball after each step to ensure the perturbation remains within budget:
x_0 = x
x_{t+1} = Π_{x+S}(x_t + α · sign(∇_x L(f(x_t), y)))Where Π_{x+S} is the projection onto the L-infinity ball of radius ε around x, and α is the step size (typically ε/10).
def pgd_attack(model, images, labels, epsilon, alpha, num_steps, random_start=True):
    images = images.clone()

    if random_start:
        # Start from a random point in the ε-ball for better exploration
        delta = torch.empty_like(images).uniform_(-epsilon, epsilon)
        images = torch.clamp(images + delta, 0, 1)

    for _ in range(num_steps):
        images = images.clone().requires_grad_(True)

        outputs = model(images)
        loss = F.cross_entropy(outputs, labels)

        model.zero_grad()
        loss.backward()

        grad_sign = images.grad.sign()
        images = images.detach() + alpha * grad_sign

        # Project back to ε-ball around original
        delta = torch.clamp(images - images.detach(), -epsilon, epsilon)
        images = torch.clamp(images.detach() + delta, 0, 1)

return images.detach()PGD is considered the standard for evaluating adversarial robustness because it is a strong attack that, with enough steps, finds near-optimal adversarial examples within the ε-constraint. A model that is robust to PGD-20 (20 steps) is generally considered to have meaningful adversarial robustness.
Carlini-Wagner (C&W) Attack
The C&W attack formulates adversarial example generation as an optimization problem that directly minimizes perturbation size while maximizing the margin between the target class and all other classes:
minimize ||δ||_2 + c · f(x + δ)
subject to x + δ ∈ [0,1]^nWhere f is a specially crafted objective function. C&W is significantly stronger than PGD but also much slower (requires many iterations per example). It is primarily used for robustness evaluation rather than training, and it is the attack used to break many proposed defenses.
# Using Foolbox for C&W
import foolbox as fb
import torch

model.eval()
fmodel = fb.PyTorchModel(model, bounds=(0, 1))

attack = fb.attacks.L2CarliniWagnerAttack(
    binary_search_steps=9,
    steps=1000,
    confidence=0,
    initial_const=0.001,
    abort_early=True,
)

# Run attack
_, adversarials, success = attack(fmodel, images, labels, epsilons=[0.5])
attack_success_rate = success.float().mean().item()Foolbox: Practical Adversarial Testing Library
Foolbox is the most widely used library for adversarial robustness testing. It supports PyTorch, TensorFlow, and JAX, implements dozens of attacks, and provides a clean evaluation API.
import foolbox as fb
import torch
import torchvision.models as models

# Wrap your model
model = models.resnet50(pretrained=True).eval()
preprocessing = dict(mean=[0.485, 0.456, 0.406], std=[0.229, 0.224, 0.225], axis=-3)
fmodel = fb.PyTorchModel(model, bounds=(0, 1), preprocessing=preprocessing)

# Define attacks to benchmark
attacks = [
    fb.attacks.FGSM(),
    fb.attacks.LinfPGD(steps=20),
    fb.attacks.LinfPGD(steps=100),
    fb.attacks.L2CarliniWagnerAttack(steps=1000),
    fb.attacks.LinfDeepFoolAttack(),
    fb.attacks.LinfAutoAttack(),   # strongest standard benchmark
]

epsilons = [0.001, 0.005, 0.01, 0.05]

def benchmark_robustness(fmodel, images, labels, attacks, epsilons):
    results = {}

    # Baseline clean accuracy
    clean_acc = fb.accuracy(fmodel, images, labels)
    results["clean"] = clean_acc

    for attack in attacks:
        attack_name = attack.__class__.__name__
        results[attack_name] = {}

        for eps in epsilons:
            _, _, success = attack(fmodel, images, labels, epsilons=[eps])
            robust_acc = 1 - success.float().mean().item()
            results[attack_name][eps] = robust_acc

return resultsAutoAttack: The Reliable Robustness Benchmark
AutoAttack (Croce & Hein, 2020) is the current standard for reliable robustness evaluation. It is an ensemble of four complementary attacks:
- APGD-CE — adaptive PGD with cross-entropy loss
- APGD-DLR — adaptive PGD with DLR loss (more reliable than CE for confident predictions)
- FAB — Fast Adaptive Boundary attack (minimizes perturbation norm)
- Square Attack — score-based black-box attack (no gradient access)
The ensemble design means AutoAttack is much harder to defeat with gradient masking defenses than any single attack.
from autoattack import AutoAttack

adversary = AutoAttack(
    model,
    norm='Linf',
    eps=8/255,  # standard epsilon for ImageNet
    version='standard',
    verbose=True,
)

x_adv = adversary.run_standard_evaluation(
    test_loader.dataset.data[:1000],
    test_loader.dataset.targets[:1000],
    bs=256,
)Adversarial Robustness for NLP Models
Adversarial robustness is not limited to image classification. NLP models face analogous attacks where small, semantically preserving text changes cause large changes in predictions.
TextAttack Library
TextAttack provides a unified interface for adversarial NLP attacks:
import textattack
from textattack.attack_recipes import TextFoolerJin2019, BERTAttackLi2020
from textattack.datasets import HuggingFaceDataset
from textattack.models.wrappers import HuggingFaceModelWrapper
from transformers import AutoTokenizer, AutoModelForSequenceClassification

# Wrap your model
model_name = "textattack/bert-base-uncased-SST-2"
tokenizer = AutoTokenizer.from_pretrained(model_name)
model = AutoModelForSequenceClassification.from_pretrained(model_name)
model_wrapper = HuggingFaceModelWrapper(model, tokenizer)

# Run TextFooler attack — replaces words with semantically similar synonyms
attack = TextFoolerJin2019.build(model_wrapper)
dataset = HuggingFaceDataset("sst2", split="test")

attacker = textattack.Attacker(attack, dataset)
results = attacker.attack_n_samples(n=200)

# Calculate adversarial accuracy
successful_attacks = sum(1 for r in results if isinstance(r, textattack.attack_results.SuccessfulAttackResult))
print(f"Attack success rate: {successful_attacks / len(results):.2%}")Common NLP adversarial attack types:
- Word substitution (TextFooler, BERT-Attack) — replace words with synonyms that preserve meaning but change prediction
- Character-level perturbations — typos, character insertions/deletions (tests robustness to real-world noise)
- Paraphrase attacks — replace sentences with semantically equivalent paraphrases
- Back-translation — translate to another language and back to generate semantically similar inputs
Certified Robustness Testing
Standard adversarial testing tells you whether a specific attack succeeds. Certified robustness testing provides guarantees: for a given input and perturbation budget, the model's prediction is provably stable.
Randomized Smoothing is the most practical certified robustness method for large models:
from smoothing import Smooth

# Wrap model with Gaussian noise smoothing
smoothed_model = Smooth(
    base_classifier=model,
    num_classes=10,
    sigma=0.25,  # noise standard deviation
)

# Certified prediction: returns (class, certified_radius)
# certified_radius is the L2 radius within which the prediction is guaranteed stable
prediction, radius = smoothed_model.certify(
    x=test_image,
    n0=100,   # samples for prediction
    n=1000,   # samples for certification
    alpha=0.001,  # failure probability
    batch_size=400,
)

print(f"Prediction: {prediction}, Certified L2 radius: {radius:.3f}")A certified radius of 0.0 means the method abstains (cannot certify). Aggregate metrics:
- Certified accuracy at radius r — fraction of test set with correct prediction and certified radius ≥ r
- Certified accuracy curve — plot certified accuracy vs. radius to visualize the robustness-accuracy tradeoff
Building a Robustness Benchmark
A robustness benchmark should be part of your ML model evaluation pipeline, not a one-off exercise. The benchmark answers: "relative to last release, is this model more or less robust?"
# benchmark/robustness_suite.py
import json
from pathlib import Path
from datetime import datetime

ROBUSTNESS_CONFIG = {
    "attacks": [
        {"name": "FGSM", "epsilon": 8/255},
        {"name": "PGD-20", "epsilon": 8/255, "steps": 20, "alpha": 2/255},
        {"name": "PGD-100", "epsilon": 8/255, "steps": 100, "alpha": 2/255},
        {"name": "AutoAttack", "epsilon": 8/255},
    ],
    "thresholds": {
        "clean_accuracy_min": 0.75,
        "pgd20_accuracy_min": 0.45,   # fail build if robust accuracy drops below this
        "autoattack_accuracy_min": 0.40,
    }
}

def run_robustness_benchmark(model, test_loader, model_version: str):
    results = {"version": model_version, "timestamp": datetime.utcnow().isoformat()}

    for attack_config in ROBUSTNESS_CONFIG["attacks"]:
        metrics = evaluate_attack(model, test_loader, attack_config)
        results[attack_config["name"]] = metrics
        print(f"{attack_config['name']}: clean={metrics['clean_acc']:.3f}, robust={metrics['robust_acc']:.3f}")

    # Save results
    output_path = Path(f"robustness-results/{model_version}.json")
    output_path.parent.mkdir(exist_ok=True)
    output_path.write_text(json.dumps(results, indent=2))

    # Check thresholds
    violations = []
    for metric_name, threshold in ROBUSTNESS_CONFIG["thresholds"].items():
        # Parse metric name to get attack and metric type
        # ... (implementation detail)
        pass

    return results, violations

# CI integration
if __name__ == "__main__":
    results, violations = run_robustness_benchmark(model, test_loader, MODEL_VERSION)
    if violations:
        print(f"ROBUSTNESS REGRESSIONS DETECTED: {violations}")
sys.exit(1)Practical Recommendations
Start with AutoAttack as your standard benchmark. It is the hardest to game and the most widely used in the research community, so your numbers will be comparable to the literature.
Use adversarial training for models where robustness is critical. Adversarial training — training on both clean and adversarially perturbed examples — is currently the most effective technique for improving robustness. The tradeoff is typically 5–15% clean accuracy reduction.
Be skeptical of claimed robustness without AutoAttack numbers. Many proposed defenses were later broken by stronger attacks. The history of adversarial ML is littered with "defense" papers that were defeated within months. If you are evaluating a defense, require AutoAttack results.
Track robustness across model updates. Even if you do not actively adversarially train, including robustness metrics in your model evaluation scorecard ensures that a model update does not silently degrade robustness.
Test on distribution-shifted data as well. Adversarial robustness and natural distribution shift robustness are related but distinct. A model that is PGD-robust may still fail badly on blurred, noisy, or domain-shifted inputs. Test both.
Conclusion
Adversarial robustness testing has matured from a research curiosity into an engineering discipline. The attacks are well-understood and implemented in production-quality libraries. The evaluation protocols (AutoAttack, RobustBench) provide standardized benchmarks. The tooling (Foolbox, ART, TextAttack) makes integration into a testing pipeline straightforward.
The cost of ignoring robustness is visible in production: image classifiers fooled by printed patches, spam filters defeated by synonym substitution, fraud detectors bypassed by adversarially crafted transactions. Systematic robustness testing catches these failures before deployment.
Start with a clean accuracy baseline, add PGD-20 robustness as a tracked metric, set a floor threshold that blocks model releases, and run AutoAttack on major model versions. Robustness does not happen by accident — it happens because someone is measuring it.